python 🐍
How to Build an API Using FastAPI
As a Computer Science master's student currently studying Python, and with 5 years of experience as a software engineer, I have spent most of my career working as a front-end developer, building innovative and amazing UIs. However, I have a deep passion for AI and languages like Python, which has led me to explore backend development and API design. FastAPI is a modern, fast (high-performance) web framework for building APIs with Python 3.7+ based on standard Python type hints. It provides automatic OpenAPI documentation and high performance thanks to Starlette and Pydantic.
In this guide, we'll explain what it is an API, how do they work, what kind of API methods we have available and we'll walk you through building a simple API using FastAPI, focusing on best practices and real-world applications.
Understanding APIs
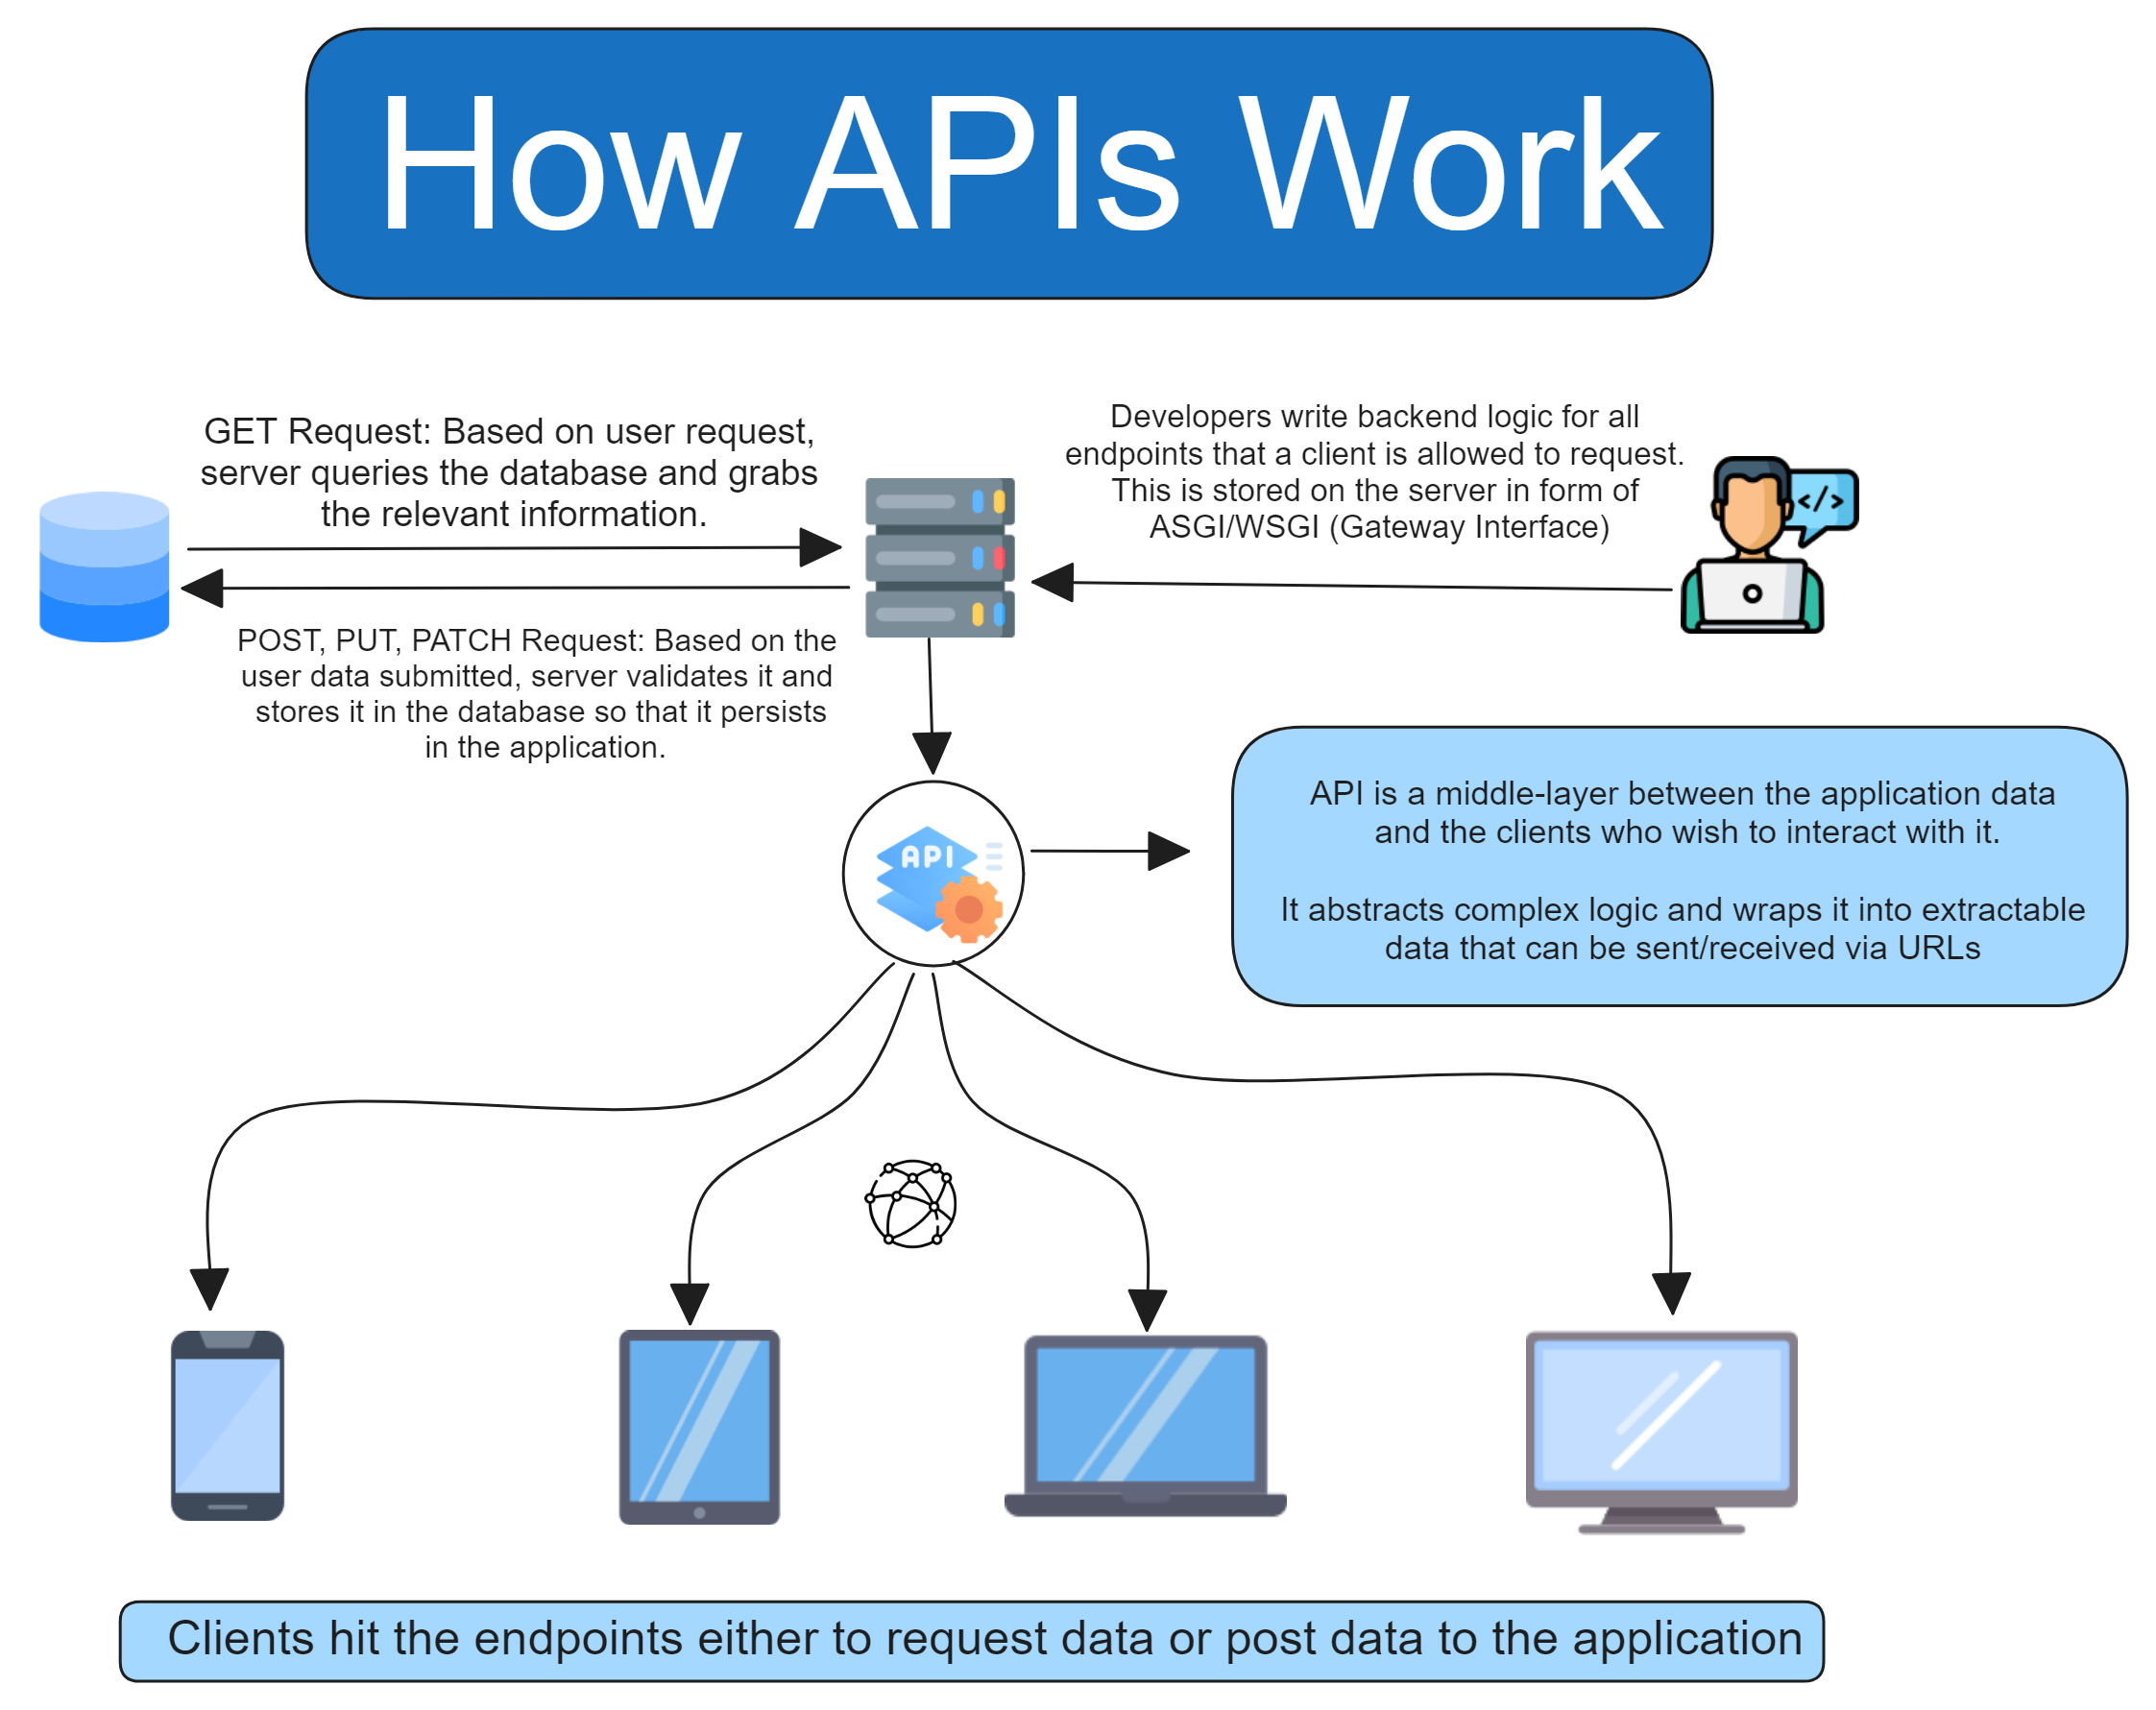
An API (Application Programming Interface) is the messenger that lets your front-end applications (like web or mobile apps) communicate with back-end servers. Think of it as a waiter: you (the client) send an order (request), and the waiter (API) delivers your food (data) from the kitchen (server).
Key Components:
-
Client: The front-end (browser or app) that makes the request.
-
Server: The back-end that processes requests and returns responses.
-
Request & Response: The exchange that includes HTTP methods (GET, POST, DELETE, PATCH, etc.), URLs, headers, and data payloads.

Introducing FastAPI
FastAPI is a modern, Python-based web framework built on top of Starlette and Pydantic. It uses Python’s type hints to automatically validate data and generate interactive documentation. Its asynchronous capabilities mean it can handle thousands of requests per second, making it ideal for both small projects and large-scale applications.
Why Choose FastAPI?
-
Speed: Built for low-latency processing.
-
Simplicity: Clean, intuitive syntax.
-
Automatic Documentation: Out-of-the-box Swagger UI and ReDoc.
-
Asynchronous Programming: Effortlessly handles concurrent requests.
-
Type Safety: Uses Python type hints to catch errors early.
Prerequisites
Before starting, ensure you have the following:
- Python 3.7+
- pip (Python package manager)
- A code editor (VS Code, PyCharm, etc.)
- Basic understanding of Python and RESTful APIs
Step 1: Install FastAPI and Uvicorn
First, install FastAPI and Uvicorn (a high-performance ASGI server) using pip:
1pip install fastapi uvicorn
Step 2: Create the API Application
Create a new Python file, e.g., main.py, and start by importing FastAPI:
1from fastapi import FastAPI 2 3app = FastAPI() 4 5@app.get("/") 6def read_root(): 7 return {"message": "Welcome to FastAPI!"}
Here, we create an instance of FastAPI and define a simple route (/) that returns a JSON response.
Step 3: Run the API
To start the API server, use Uvicorn:
1uvicorn main:app --reload
This will start the server at http://127.0.0.1:8000/. The --reload flag enables auto-reloading when code changes, making development more efficient.
Step 4: Structuring Your FastAPI Project
As your FastAPI application grows, it's best to separate concerns by organizing your code into different files. Here’s a recommended project structure:
1/my_fastapi_project 2│── main.py # Entry point (app instance & server start) 3│── /routes 4│ ├── items.py # Routes for item-related endpoints 5│── /models 6│ ├── item.py # Pydantic models 7│── /services 8│ ├── item_service.py # Business logic 9│── requirements.txt # Dependencies 10│── Dockerfile # Deployment setup
Example of a Modular FastAPI Application:
main.py (This is your entry point)
1from fastapi import FastAPI 2from routes import items 3 4app = FastAPI() 5app.include_router(items.router) # Include routes from the 'items' module 6 7@app.get("/") 8def read_root(): 9 return {"message": "Welcome to FastAPI!"}
routes/items.py (Routes for Item Handling)
1from fastapi import APIRouter 2from models.item import Item 3from typing import Optional 4 5router = APIRouter() 6 7@router.post("/items/") 8def create_item(item: Item): 9 return {"item": item} 10 11@router.get("/items/{item_id}") 12def read_item(item_id: int, q: Optional[str] = None): 13 return {"item_id": item_id, "query": q}
models/item.py (Data Model)
1from pydantic import BaseModel 2from typing import Optional 3 4class Item(BaseModel): 5 name: str 6 description: Optional[str] = None 7 price: float 8 tax: Optional[float] = None
This structure follows the best practices of how to set up your API project, making sure your API is modular, maintainable, and scalable as it grows.
Step 5: Explore Automatic Documentation
FastAPI automatically generates API documentation, saving development time. Visit:
- Swagger UI: http://127.0.0.1:8000/docs
- ReDoc: http://127.0.0.1:8000/redoc
Step 6: Deploy the API
If you want to deploy your API. Here are some options:
- Docker: Package your API in a container for easy deployment.
- AWS Lambda: Deploy as a serverless function for scalability.
- Heroku: Quick and easy cloud deployment.
Example Dockerfile:
1FROM python:3.9 2WORKDIR /app 3COPY requirements.txt ./ 4RUN pip install --no-cache-dir -r requirements.txt 5COPY . . 6CMD ["uvicorn", "main:app", "--host", "0.0.0.0", "--port", "8000"]
Final Thoughts
FastAPI simplifies API development with automatic validation, serialization, and documentation. This guide covered setting up FastAPI, creating routes, running the server, and deploying the API. As you advance, consider integrating FastAPI with databases like PostgreSQL or MongoDB for full-stack applications.
Let's start building APIs! 🐍


